Ever wondered just what that enigmatic name means?
Gaming and multimedia applications are some of the most satisfying programs you can get for your PC, but getting them to run properly isn’t always as easy as it could be. First, the PC architecture was never designed as a gaming platform. Second, the wide-ranging nature of the PC means that one person’s machine can be different from another. While games consoles all contain the same hardware, PCs don’t: the massive range of difference can make gaming a headache.
To alleviate as much of the pain as possible, Microsoft needed to introduce a common standard which all games and multimedia applications could follow – a common interface between the OS and whatever hardware is installed in the PC, if you like. This common interface is DirectX, something which can be the source of much confusion.
DirectX is an interface designed to make certain programming tasks much easier, for both the game developer and the rest of us who just want to sit down and play the latest blockbuster. Before we can explain what DirectX is and how it works though, we need a little history lesson.
DirectX history:
Any game needs to perform certain tasks again and again. It needs to watch for your input from mouse, joystick or keyboard, and it needs to be able to display screen images and play sounds or music. That’s pretty much any game at the most simplistic level.
Imagine how incredibly complex this was for programmers developing on the early pre-Windows PC architecture, then. Each programmer needed to develop their own way of reading the keyboard or detecting whether a joystick was even attached, let alone being used to play the game. Specific routines were needed even to display the simplest of images on the screen or play a simple sound.
Essentially, the game programmers were talking directly to your PC’s hardware at a fundamental level. When Microsoft introduced Windows, it was imperative for the stability and success of the PC platform that things were made easier for both the developer and the player. After all, who would bother writing games for a machine when they had to reinvent the wheel every time they began work on a new game? Microsoft’s idea was simple: stop programmers talking directly to the hardware, and build a common toolkit which they could use instead. DirectX was born.
How it works:
At the most basic level, DirectX is an interface between the hardware in your PC and Windows itself, part of the Windows API or Application Programming Interface. Let’s look at a practical example. When a game developer wants to play a sound file, it’s simply a case of using the correct library function. When the game runs, this calls the DirectX API, which in turn plays the sound file. The developer doesn’t need to know what type of sound card he’s dealing with, what it’s capable of, or how to talk to it. Microsoft has provided DirectX, and the sound card manufacturer has provided a DirectX-capable driver. He asks for the sound to be played, and it is – whichever machine it runs on.
From our point of view as gamers, DirectX also makes things incredibly easy – at least in theory. You install a new sound card in place of your old one, and it comes with a DirectX driver. Next time you play your favourite game you can still hear sounds and music, and you haven’t had to make any complex configuration changes.
Originally, DirectX began life as a simple toolkit: early hardware was limited and only the most basic graphical functions were required. As hardware and software has evolved in complexity, so has DirectX. It’s now much more than a graphical toolkit, and the term has come to encompass a massive selection of routines which deal with all sorts of hardware communication. For example, the DirectInput routines can deal with all sorts of input devices, from simple two-button mice to complex flight joysticks. Other parts include DirectSound for audio devices and DirectPlay provides a toolkit for online or multiplayer gaming.
DirectX versions:
The current version of DirectX at time of writing is DirectX 9.0. This runs on all versions of Windows from Windows 98 up to and including Windows Server 2003 along with every revision in between. It doesn’t run on Windows 95 though: if you have a machine with Windows 95 installed, you’re stuck with the older and less capable 8.0a. Windows NT 4 also requires a specific version – in this case, it’s DirectX 3.0a.
With so many versions of DirectX available over the years, it becomes difficult to keep track of which version you need. In all but the most rare cases, all versions of DirectX are backwardly compatible – games which say they require DirectX 7 will happily run with more recent versions, but not with older copies. Many current titles explicitly state that they require DirectX 9, and won’t run without the latest version installed. This is because they make use of new features introduced with this version, although it has been known for lazy developers to specify the very latest version as a requirement when the game in question doesn’t use any of the new enhancements. Generally speaking though, if a title is version locked like this, you will need to upgrade before you can play. Improvements to the core DirectX code mean you may even see improvements in many titles when you upgrade to the latest build of DirectX. Downloading and installing DirectX need not be complex, either.
Upgrading DirectX:
All available versions of Windows come with DirectX in one form or another as a core system component which cannot be removed, so you should always have at least a basic implementation of the system installed on your PC. However, many new games require the very latest version before they work properly, or even at all.
Generally, the best place to install the latest version of DirectX from is the dedicated section of the Microsoft Web site, which is found at hxxp://www.microsoft.com/windows/directx. As we went to press, the most recent build available for general download was DirectX 9.0b. You can download either a simple installer which will in turn download the components your system requires as it installs, or download the complete distribution package in one go for later offline installation.
Another good source for DirectX is games themselves. If a game requires a specific version, it’ll be on the installation CD and may even be installed automatically by the game’s installer itself. You won’t find it on magazine cover discs though, thanks to Microsoft’s licensing terms.
Diagnosing problems
Diagnosing problems with a DirectX installation can be problematic, especially if you don’t know which one of the many components is causing your newly purchased game to fall over. Thankfully, Microsoft provides a useful utility called the DirectX Diagnostic Tool, although this isn’t made obvious. You won’t find this tool in the Start Menu with any version of Windows, and each tends to install it in a different place.
The easiest way to use it is to open the Start Menu’s Run dialog, type in dxdiag and then click OK. When the application first loads, it takes a few seconds to interrogate your DirectX installation and find any problems. First, the DirectX Files tab displays version information on each one of the files your installation uses. The Notes section at the bottom is worth checking, as missing or corrupted files will be flagged here.
The tabs marked Display, Sound, Music, Input and Network all relate to specific areas of DirectX, and all but the Input tab provide tools to test the correct functioning on your hardware. Finally, the More Help tab provides a useful way to start the DirectX Troubleshooter, Microsoft’s simple linear problem solving tool for many common DirectX issues.
WISE WORDS:A house full of books, and a garden of flowers.
Showing posts with label Windows. Show all posts
Showing posts with label Windows. Show all posts
Friday, August 17, 2007


Dual Boot After The Fact
Let's consider a situation...
I want to run both Windows 2000 Pro and Windows 98 SE on my computer. When I bought a new hard drive, I installed Windows 2000 on it first. But my subsequent research seems to indicate that I should have installed Windows 98 SE first and then Windows 2000 on a separate partition. How do I remove Windows 2000 from the drive so I can partition it and then install Windows 98 SE first and reinstall Windows 2000?
Did you ever face this kind of circumstance? Well here is the good news..
You don't have to remove Windows 2000. Start by installing Windows 98 SE in a different partition. When you're done, insert the Windows 2000 CD and reboot to start Windows 2000 setup. On the Welcome to Setup page, press R (for Repair). When you reach the Windows 2000 Repair Options page, press R again.
You'll then be prompted to select a repair option. Press M for Manual. Then press the Up Arrow until Verify Windows 2000 system files is highlighted; press Enter to clear this selection. Press the Down Arrow to select Continue (perform selected tasks), and then press Enter.
The system will ask whether you have an emergency repair disk. Press L, indicating it should Locate your existing installation. Once it does so, press Enter to complete the repairs. This will establish dual boot for you. (This procedure also works for Windows XP.)
*NOTE:
Don't know if this will also work for Linux. If anyone does try it, please let me know.
WISE WORDS:The happy only are the truly great.
I want to run both Windows 2000 Pro and Windows 98 SE on my computer. When I bought a new hard drive, I installed Windows 2000 on it first. But my subsequent research seems to indicate that I should have installed Windows 98 SE first and then Windows 2000 on a separate partition. How do I remove Windows 2000 from the drive so I can partition it and then install Windows 98 SE first and reinstall Windows 2000?
Did you ever face this kind of circumstance? Well here is the good news..
You don't have to remove Windows 2000. Start by installing Windows 98 SE in a different partition. When you're done, insert the Windows 2000 CD and reboot to start Windows 2000 setup. On the Welcome to Setup page, press R (for Repair). When you reach the Windows 2000 Repair Options page, press R again.
You'll then be prompted to select a repair option. Press M for Manual. Then press the Up Arrow until Verify Windows 2000 system files is highlighted; press Enter to clear this selection. Press the Down Arrow to select Continue (perform selected tasks), and then press Enter.
The system will ask whether you have an emergency repair disk. Press L, indicating it should Locate your existing installation. Once it does so, press Enter to complete the repairs. This will establish dual boot for you. (This procedure also works for Windows XP.)
*NOTE:
Don't know if this will also work for Linux. If anyone does try it, please let me know.
WISE WORDS:The happy only are the truly great.
Thursday, August 16, 2007
Remove Linux From Your Pc Safely, ...and restoring your MBR
First of all you need to know where your Linux OS is installed to. that is what drive it is currently living on. Bear in mind that Linux formats the drive as HFS rather than Fat/Fat32 or NTFS. ( These are the file systems used by various Operating Systems).
So HFS Partitions are not seen by windows, so its hidden.
To remove the partitions of Linux in WindowsXP go to your 'Control panel' > Admistrative Tools > Computer Managment
Open 'Disk Management' and you will see your Linux drives recognised as 'Unknown Partition' plus the status of the drive. Bearing in mind you know what partition and disk you installed to it will be easier to recognise as the drive/partition where you had installed it to.
Once you have identifed the drives, 'right-Click' on the drive/partiton and select 'Delete Logical Drive'
Once you have followed this through, you will now have free space.
This next part is very important. Once you have formatted the drive, re format it as your required file system type. either Fat32 or NTFS. Now the important part is coming up !
Fixing your Master Boot Record[MBR] to make Windows Bootable again.
Have a Windows Boot disk with all the basic DOS Commands loaded on to the disk. A standard Windows 98/Me Boot Disk will work too.
Type in the DOS command :
e.g, from your C:\
fdisk /mbr
Or use your Windows XP run the recovery console, pick which xp install you would like to boot in to (usually you will pick #1)
then type: fixmbr. Answer Y to the dialoge.
Your master boot record will now be restored and Windows XP will be bootable once again. Your System will be restored with your original boot loader that you got with Windows XP.
So HFS Partitions are not seen by windows, so its hidden.
To remove the partitions of Linux in WindowsXP go to your 'Control panel' > Admistrative Tools > Computer Managment
Open 'Disk Management' and you will see your Linux drives recognised as 'Unknown Partition' plus the status of the drive. Bearing in mind you know what partition and disk you installed to it will be easier to recognise as the drive/partition where you had installed it to.
Once you have identifed the drives, 'right-Click' on the drive/partiton and select 'Delete Logical Drive'
Once you have followed this through, you will now have free space.
This next part is very important. Once you have formatted the drive, re format it as your required file system type. either Fat32 or NTFS. Now the important part is coming up !
Fixing your Master Boot Record[MBR] to make Windows Bootable again.
Have a Windows Boot disk with all the basic DOS Commands loaded on to the disk. A standard Windows 98/Me Boot Disk will work too.
Type in the DOS command :
e.g, from your C:\
fdisk /mbr
Or use your Windows XP run the recovery console, pick which xp install you would like to boot in to (usually you will pick #1)
then type: fixmbr. Answer Y to the dialoge.
Your master boot record will now be restored and Windows XP will be bootable once again. Your System will be restored with your original boot loader that you got with Windows XP.
Regedit.exe & Regedt32.exe, Whats the difference???
Have you ever noticed that there are two versions of the Registry Editor on your computer? Ever wondered why? Well let me just give you a little insight!
It all depends on your Operating System. If you have Windows 2000 :
Regedit.exe
Regedit.exe is included with Windows NT 4.0 and Windows 2000 primarily for its search capability. You can use Regedit.exe to make changes in the Windows NT 4.0 and Windows 2000 registry, but you cannot use it to view or edit all functions or data types on Windows NT 4.0 and Windows 2000.
The following limitations exist in the Regedit.exe version that is included with Windows NT 4.0 and Windows 2000:
You cannot set the security for registry keys.
You cannot view, edit, or search the value data types <>REG_EXPAND_SZ and <>REG_MULTI_SZ. If you try to view a <>REG_EXPAND_SZ value, Regedit.exe displays it as a binary data type. If you try to edit either of these data types, Regedit.exe saves it as <>REG_SZ, and the data type no longer performs its intended function.
You cannot save or restore keys as hive files.
Microsoft recommends that you use Regedit.exe only for its search capabilities on a Windows NT 4.0-based or Windows 2000-based computer.
Regedt32.exe
Regedt32.exe is the configuration editor for Windows NT 4.0 and Windows 2000. Regedt32.exe is used to modify the Windows NT configuration database, or the Windows NT registry. This editor allows you to view or modify the Windows NT registry.The editor provides views of windows that represent sections of the registry, named hives. Each window displays two sections. On the left side, there are folders that represent registry keys. On the right side,there are the values associated with the selected registry key. Regedt32 is a powerful tool, and you must use it with extreme caution when you change registry values. Missing or incorrect values in the registry can make the Windows installation unusable.
Note: Unlike Regedit.exe, Regedt32.exe does not support importing and exporting registration entries (.reg) files.
Or..Windows XP and Windows Server 2003
Regedit.exe
Regedit.exe is the configuration editor for Windows XP and Windows Server 2003. Regedit.exe is used to modify the Windows NT configuration database, or the Windows NTregistry. This editor allows you to view or modify the Windows NT registry. It supports setting security on registry keys, viewing and editing <>REG_EXPAND_SZ and <>REG_MULTI_SZ, and saving and restoring hive files.On the leftside, there are folders that represent registry keys. On the right side,there are the values associated with the selected registry key. Regedit is a powerful tool. You must use extreme caution when you use it to change registry values. Missing or incorrect values in the registry can make the Windows installation unusable.
Regedt32.exe
In Windows XP and Windows Server 2003, Regedt32.exe is a small program that just runs Regedit.exe.
It all depends on your Operating System. If you have Windows 2000 :
Regedit.exe
Regedit.exe is included with Windows NT 4.0 and Windows 2000 primarily for its search capability. You can use Regedit.exe to make changes in the Windows NT 4.0 and Windows 2000 registry, but you cannot use it to view or edit all functions or data types on Windows NT 4.0 and Windows 2000.
The following limitations exist in the Regedit.exe version that is included with Windows NT 4.0 and Windows 2000:
You cannot set the security for registry keys.
You cannot view, edit, or search the value data types <>REG_EXPAND_SZ and <>REG_MULTI_SZ. If you try to view a <>REG_EXPAND_SZ value, Regedit.exe displays it as a binary data type. If you try to edit either of these data types, Regedit.exe saves it as <>REG_SZ, and the data type no longer performs its intended function.
You cannot save or restore keys as hive files.
Microsoft recommends that you use Regedit.exe only for its search capabilities on a Windows NT 4.0-based or Windows 2000-based computer.
Regedt32.exe
Regedt32.exe is the configuration editor for Windows NT 4.0 and Windows 2000. Regedt32.exe is used to modify the Windows NT configuration database, or the Windows NT registry. This editor allows you to view or modify the Windows NT registry.The editor provides views of windows that represent sections of the registry, named hives. Each window displays two sections. On the left side, there are folders that represent registry keys. On the right side,there are the values associated with the selected registry key. Regedt32 is a powerful tool, and you must use it with extreme caution when you change registry values. Missing or incorrect values in the registry can make the Windows installation unusable.
Note: Unlike Regedit.exe, Regedt32.exe does not support importing and exporting registration entries (.reg) files.
Or..Windows XP and Windows Server 2003
Regedit.exe
Regedit.exe is the configuration editor for Windows XP and Windows Server 2003. Regedit.exe is used to modify the Windows NT configuration database, or the Windows NTregistry. This editor allows you to view or modify the Windows NT registry. It supports setting security on registry keys, viewing and editing <>REG_EXPAND_SZ and <>REG_MULTI_SZ, and saving and restoring hive files.On the leftside, there are folders that represent registry keys. On the right side,there are the values associated with the selected registry key. Regedit is a powerful tool. You must use extreme caution when you use it to change registry values. Missing or incorrect values in the registry can make the Windows installation unusable.
Regedt32.exe
In Windows XP and Windows Server 2003, Regedt32.exe is a small program that just runs Regedit.exe.
Tuesday, August 14, 2007
How Long Has Your System Been Running?
Here's how you verify system uptime:
Click Start | Run and type cmd to open a command prompt.
At the prompt, type systeminfo
Scroll down the list of information to the line that says System Up Time.
This will tell you in days, hours, minutes and seconds how long the system has been up.
Note that this command only works in XP Pro, not in XP Home. You can, however, type net statistics workstation at the prompt in Home. The first line will tell you the day and time that the system came online.
Click Start | Run and type cmd to open a command prompt.
At the prompt, type systeminfo
Scroll down the list of information to the line that says System Up Time.
This will tell you in days, hours, minutes and seconds how long the system has been up.
Note that this command only works in XP Pro, not in XP Home. You can, however, type net statistics workstation at the prompt in Home. The first line will tell you the day and time that the system came online.
Sunday, August 12, 2007
10 reasons why PCs crash U must Know
You have just been struck by the Blue Screen of Death (BOD). Anyone who uses Mcft Windows will be familiar with this. What can you do? More importantly, how can you prevent it happening?
1. Hardware conflict:
The number one reason why Windows crashes is hardware conflict. Each hardware device communicates to other devices through an interrupt request channel (IRQ). These are supposed to be unique for each device.
For example, a printer usually connects internally on IRQ 7. The keyboard usually uses IRQ 1 and the floppy disk drive IRQ 6. Each device will try to hog a single IRQ for itself.
If there are a lot of devices, or if they are not installed properly, two of them may end up sharing the same IRQ number. When the user tries to use both devices at the same time, a crash can happen. The way to check if your computer has a hardware conflict is through the following route:
* Start -> Settings -> Control Panel -> System-> Hardware -> Device Manager.
Often if a device has a problem a yellow '!' appears next to its description in the Device Manager. Highlight Computer (in the Device Manager) and press Properties to see the IRQ numbers used by your computer. If the IRQ number appears twice, two devices may be using it.
Sometimes a device might share an IRQ with something described as 'IRQ holder for PCI steering'. This can be ignored. The best way to fix this problem is to remove the problem device and reinstall it.
Sometimes you may have to find more recent drivers on the internet to make the device function properly. A good resource is www.driverguide.com. If the device is a sound card, or a modem, it can often be fixed by moving it to a different slot on the motherboard (be careful about opening your computer, as you may void the warranty).
When working inside a computer you should switch it off, unplug the mains lead and touch an unpainted metal surface to discharge any static electricity.
To be fair to Mcft, the problem with IRQ numbers is not of its making. It is a legacy problem going back to the first PC designs using the IBM 8086 chip. Initially there were only eight IRQs. Today there are 16 IRQs in a PC. It is easy to run out of them. There are plans to increase the number of IRQs in future designs.
2. Bad RAM:
RAM (random-access memory) problems might bring on the blue screen of death with a message saying Fatal Exception Error. A fatal error indicates a serious hardware problem. Sometimes it may mean a part is damaged and will need replacing.
But a fatal error caused by Ram might be caused by a mismatch of chips. For example, mixing 70-nanosecond (70ns) Ram with 60ns Ram will usually force the computer to run all the Ram at the slower speed. This will often crash the machine if the Ram is overworked.
One way around this problem is to enter the BIOS settings and increase the wait state of the Ram. This can make it more stable. Another way to troubleshoot a suspected Ram problem is to rearrange the Ram chips on the motherboard, or take some of them out. Then try to repeat the circumstances that caused the crash. When handling Ram try not to touch the gold connections, as they can be easily damaged.
Parity error messages also refer to Ram. Modern Ram chips are either parity (ECC) or non parity (non-ECC). It is best not to mix the two types, as this can be a cause of trouble.
EMM386 error messages refer to memory problems but may not be connected to bad Ram. This may be due to free memory problems often linked to old Dos-based programmes.
3. BIOS settings:
Every motherboard is supplied with a range of chipset settings that are decided in the factory. A common way to access these settings is to press the F2 or delete button during the first few seconds of a boot-up[this is how we can get into BIOS].
Once inside the BIOS, great care should be taken. It is a good idea to write down on a piece of paper all the settings that appear on the screen. That way, if you change something and the computer becomes more unstable, you will know what settings to revert to.
A common BIOS error concerns the CAS latency. This refers to the Ram. Older EDO (extended data out) Ram has a CAS latency of 3. Newer SDRam has a CAS latency of 2. Setting the wrong figure can cause the Ram to lock up and freeze the computer's display.
Mcft Windows is better at allocating IRQ numbers than any BIOS. If possible set the IRQ numbers to Auto in the BIOS. This will allow Windows to allocate the IRQ numbers (make sure the BIOS setting for Plug and Play OS is switched to 'yes' to allow Windows to do this.).
4. Hard disk drives:
After a few weeks, the information on a hard disk drive starts to become piecemeal or fragmented. It is a good idea to defragment the hard disk every week or so, to prevent the disk from causing a screen freeze. Go to
* Start -> Programs -> Accessories -> System Tools ->Disk Defragmenter
This will start the procedure. You will be unable to write data to the hard drive (to save it) while the disk is defragmenting, so it is a good idea to schedule the procedure for a period of inactivity using the Task Scheduler.
Fire up the Task Scheduler from Start -> Settings -> Control Panel -> Scheduled Tasks.
Some lockups and screen freezes caused by hard disk problems can be solved by reducing the read-ahead optimization. This can be adjusted by going to
Hard disks will slow down and crash if they are too full. Do some housekeeping on your hard drive every few months and free some space on it. Open the Windows folder on the C drive and find the Temporary Internet Files folder. Deleting the contents (not the folder) can free a lot of space.
Empty the Recycle Bin every week to free more space. Hard disk drives should be scanned every week for errors or bad sectors. Go to
* Start-Programs-Accessories-System Tools-ScanDisk
Otherwise assign the Task Scheduler to perform this operation.
5. Fatal OE exceptions and VXD errors:
Fatal OE exception errors and VXD errors are often caused by video card problems.
These can often be resolved easily by reducing the resolution of the video display. Go to
* Start -> Settings -> Control Panel -> Display -> Settings
Here you should slide the screen area bar to the left. Take a look at the colour settings on the left of that window.
If the screen freezes or you experience system lockups it might be due to the video card. Make sure it does not have a hardware conflict. Go to
* Start-Settings-Control Panel-System-Device Manager
Here, select the '+' beside Display Adapter. A line of text describing your video card should appear. Select it and Right click -> properties. Then select Resources and select each line in the window. Look for a message that says No Conflicts.
If you have video card hardware conflict, you will see it here. Be careful at this point and make a note of everything you do in case you make things worse.
The way to resolve a hardware conflict is to uncheck the Use Automatic Settings box and hit the Change Settings button. You are searching for a setting that will display a No Conflicts message.
As ever, the most common cause of problems relating to graphics cards is old or faulty device drivers (a driver is a small piece of software used by a computer to communicate with a device).
Look up your video card's manufacturer on the internet and search for the most recent drivers for it.
6. Viruses:
Often the first sign of a virus infection is instability. Some viruses erase the boot sector of a hard drive, making it impossible to start. This is why it is a good idea to create a Windows start-up disk. Go to
* Start-Settings-Control Panel-Add/Remove Programs
Here, look for the Start Up Disk tab. Virus protection requires constant vigilance.
A virus scanner requires a list of virus signatures in order to be able to identify viruses. These signatures are stored in a DAT file. DAT files should be updated weekly from the website of your antivirus software manufacturer.
An excellent antivirus programme is McAfee VirusScan by Network Associates. Another is Norton AntiVirus.
7. Printers:
The action of sending a document to print creates a bigger file, often called a postscript file.
Printers have only a small amount of memory, called a buffer. This can be easily overloaded. Printing a document also uses a considerable amount of CPU power. This will also slow down the computer's performance.
If the printer is trying to print unusual characters, these might not be recognized, and can crash the computer. Sometimes printers will not recover from a crash because of confusion in the buffer. A good way to clear the buffer is to unplug the printer for ten seconds. Booting up from a powerless state, also called a cold boot, will restore the printer's default settings and you may be able to carry on.
8. Software:
A common cause of computer crash is faulty or badly-installed software. Often the problem can be cured by uninstalling the software and then reinstalling it. Use Norton Uninstall or Uninstall Shield to remove an application from your system properly. This will also remove references to the programme in the System Registry and leaves the way clear for a completely fresh copy.
The System Registry can be corrupted by old references to obsolete software that you thought was uninstalled. Use System Mechanic by iolo technologies to clean up the System Registry and remove obsolete entries. It works on Windows 95, Windows 98, Windows 98 SE (Second Edition), Windows Millennium Edition (ME), NT4 and Windows 2000.
Read the instructions and use it carefully so you don't do permanent damage to the Registry. If the Registry is damaged you will have to reinstall your operating system. System Mechanic can be obtained from www.iolo.com.
Often a Windows problem can be resolved by entering Safe Mode. This can be done during start-up. When you see the message "Starting Windows" press F8. This should take you into Safe Mode.
Safe Mode loads a minimum of drivers. It allows you to find and fix problems that prevent Windows from loading properly.
Sometimes installing Windows is difficult because of unsuitable BIOS settings. If you keep getting SUWIN error messages (Windows setup) during the Windows installation, then try entering the BIOS and disabling the CPU internal cache. Try to disable the Level 2 (L2) cache if that doesn't work.
Remember to restore all the BIOS settings back to their former settings following installation.
9. Overheating:
Central processing units (CPUs) are usually equipped with fans to keep them cool. If the fan fails or if the CPU gets old it may start to overheat and generate a particular kind of error called a kernel error. This is a common problem in chips that have been overclocked to operate at higher speeds than they are supposed to.
One remedy is to get a bigger better fan and install it on top of the CPU. Specialist cooling fans/heatsinks are available in the market.
CPU problems can often be fixed by disabling the CPU internal cache in the BIOS. This will make the machine run more slowly, but it should also be more stable.
10. Power supply problems:
With all the new construction going on around the country the steady supply of electricity has become disrupted. A power surge or spike can crash a computer as easily as a power cut.
If this has become a nuisance for you then consider buying a uninterrupted power supply (UPS). This will give you a clean power supply when there is electricity, and it will give you a few minutes to perform a controlled shutdown in case of a power cut.
It is a good investment if your data are critical, because a power cut will cause any unsaved data to be lost.
1. Hardware conflict:
The number one reason why Windows crashes is hardware conflict. Each hardware device communicates to other devices through an interrupt request channel (IRQ). These are supposed to be unique for each device.
For example, a printer usually connects internally on IRQ 7. The keyboard usually uses IRQ 1 and the floppy disk drive IRQ 6. Each device will try to hog a single IRQ for itself.
If there are a lot of devices, or if they are not installed properly, two of them may end up sharing the same IRQ number. When the user tries to use both devices at the same time, a crash can happen. The way to check if your computer has a hardware conflict is through the following route:
* Start -> Settings -> Control Panel -> System-> Hardware -> Device Manager.
Often if a device has a problem a yellow '!' appears next to its description in the Device Manager. Highlight Computer (in the Device Manager) and press Properties to see the IRQ numbers used by your computer. If the IRQ number appears twice, two devices may be using it.
Sometimes a device might share an IRQ with something described as 'IRQ holder for PCI steering'. This can be ignored. The best way to fix this problem is to remove the problem device and reinstall it.
Sometimes you may have to find more recent drivers on the internet to make the device function properly. A good resource is www.driverguide.com. If the device is a sound card, or a modem, it can often be fixed by moving it to a different slot on the motherboard (be careful about opening your computer, as you may void the warranty).
When working inside a computer you should switch it off, unplug the mains lead and touch an unpainted metal surface to discharge any static electricity.
To be fair to Mcft, the problem with IRQ numbers is not of its making. It is a legacy problem going back to the first PC designs using the IBM 8086 chip. Initially there were only eight IRQs. Today there are 16 IRQs in a PC. It is easy to run out of them. There are plans to increase the number of IRQs in future designs.
2. Bad RAM:
RAM (random-access memory) problems might bring on the blue screen of death with a message saying Fatal Exception Error. A fatal error indicates a serious hardware problem. Sometimes it may mean a part is damaged and will need replacing.
But a fatal error caused by Ram might be caused by a mismatch of chips. For example, mixing 70-nanosecond (70ns) Ram with 60ns Ram will usually force the computer to run all the Ram at the slower speed. This will often crash the machine if the Ram is overworked.
One way around this problem is to enter the BIOS settings and increase the wait state of the Ram. This can make it more stable. Another way to troubleshoot a suspected Ram problem is to rearrange the Ram chips on the motherboard, or take some of them out. Then try to repeat the circumstances that caused the crash. When handling Ram try not to touch the gold connections, as they can be easily damaged.
Parity error messages also refer to Ram. Modern Ram chips are either parity (ECC) or non parity (non-ECC). It is best not to mix the two types, as this can be a cause of trouble.
EMM386 error messages refer to memory problems but may not be connected to bad Ram. This may be due to free memory problems often linked to old Dos-based programmes.
3. BIOS settings:
Every motherboard is supplied with a range of chipset settings that are decided in the factory. A common way to access these settings is to press the F2 or delete button during the first few seconds of a boot-up[this is how we can get into BIOS].
Once inside the BIOS, great care should be taken. It is a good idea to write down on a piece of paper all the settings that appear on the screen. That way, if you change something and the computer becomes more unstable, you will know what settings to revert to.
A common BIOS error concerns the CAS latency. This refers to the Ram. Older EDO (extended data out) Ram has a CAS latency of 3. Newer SDRam has a CAS latency of 2. Setting the wrong figure can cause the Ram to lock up and freeze the computer's display.
Mcft Windows is better at allocating IRQ numbers than any BIOS. If possible set the IRQ numbers to Auto in the BIOS. This will allow Windows to allocate the IRQ numbers (make sure the BIOS setting for Plug and Play OS is switched to 'yes' to allow Windows to do this.).
4. Hard disk drives:
After a few weeks, the information on a hard disk drive starts to become piecemeal or fragmented. It is a good idea to defragment the hard disk every week or so, to prevent the disk from causing a screen freeze. Go to
* Start -> Programs -> Accessories -> System Tools ->Disk Defragmenter
This will start the procedure. You will be unable to write data to the hard drive (to save it) while the disk is defragmenting, so it is a good idea to schedule the procedure for a period of inactivity using the Task Scheduler.
Fire up the Task Scheduler from Start -> Settings -> Control Panel -> Scheduled Tasks.
Some lockups and screen freezes caused by hard disk problems can be solved by reducing the read-ahead optimization. This can be adjusted by going to
- Right Click on My Computer icon in your Start Menu, and choose Properties.
- Click on the Hardware Tab in the System Properties screen, and click the Device Manager button.
- Double Click the "IDE ATA/ATAPI controllers" category to see the channels underneath it.
- Double-click each IDE channel that is present and make sure that "DMA if available" is selected under the advanced settings tab.
- Reboot your computer.
Hard disks will slow down and crash if they are too full. Do some housekeeping on your hard drive every few months and free some space on it. Open the Windows folder on the C drive and find the Temporary Internet Files folder. Deleting the contents (not the folder) can free a lot of space.
Empty the Recycle Bin every week to free more space. Hard disk drives should be scanned every week for errors or bad sectors. Go to
* Start-Programs-Accessories-System Tools-ScanDisk
Otherwise assign the Task Scheduler to perform this operation.
5. Fatal OE exceptions and VXD errors:
Fatal OE exception errors and VXD errors are often caused by video card problems.
These can often be resolved easily by reducing the resolution of the video display. Go to
* Start -> Settings -> Control Panel -> Display -> Settings
Here you should slide the screen area bar to the left. Take a look at the colour settings on the left of that window.
If the screen freezes or you experience system lockups it might be due to the video card. Make sure it does not have a hardware conflict. Go to
* Start-Settings-Control Panel-System-Device Manager
Here, select the '+' beside Display Adapter. A line of text describing your video card should appear. Select it and Right click -> properties. Then select Resources and select each line in the window. Look for a message that says No Conflicts.
If you have video card hardware conflict, you will see it here. Be careful at this point and make a note of everything you do in case you make things worse.
The way to resolve a hardware conflict is to uncheck the Use Automatic Settings box and hit the Change Settings button. You are searching for a setting that will display a No Conflicts message.
As ever, the most common cause of problems relating to graphics cards is old or faulty device drivers (a driver is a small piece of software used by a computer to communicate with a device).
Look up your video card's manufacturer on the internet and search for the most recent drivers for it.
6. Viruses:
Often the first sign of a virus infection is instability. Some viruses erase the boot sector of a hard drive, making it impossible to start. This is why it is a good idea to create a Windows start-up disk. Go to
* Start-Settings-Control Panel-Add/Remove Programs
Here, look for the Start Up Disk tab. Virus protection requires constant vigilance.
A virus scanner requires a list of virus signatures in order to be able to identify viruses. These signatures are stored in a DAT file. DAT files should be updated weekly from the website of your antivirus software manufacturer.
An excellent antivirus programme is McAfee VirusScan by Network Associates. Another is Norton AntiVirus.
7. Printers:
The action of sending a document to print creates a bigger file, often called a postscript file.
Printers have only a small amount of memory, called a buffer. This can be easily overloaded. Printing a document also uses a considerable amount of CPU power. This will also slow down the computer's performance.
If the printer is trying to print unusual characters, these might not be recognized, and can crash the computer. Sometimes printers will not recover from a crash because of confusion in the buffer. A good way to clear the buffer is to unplug the printer for ten seconds. Booting up from a powerless state, also called a cold boot, will restore the printer's default settings and you may be able to carry on.
8. Software:
A common cause of computer crash is faulty or badly-installed software. Often the problem can be cured by uninstalling the software and then reinstalling it. Use Norton Uninstall or Uninstall Shield to remove an application from your system properly. This will also remove references to the programme in the System Registry and leaves the way clear for a completely fresh copy.
The System Registry can be corrupted by old references to obsolete software that you thought was uninstalled. Use System Mechanic by iolo technologies to clean up the System Registry and remove obsolete entries. It works on Windows 95, Windows 98, Windows 98 SE (Second Edition), Windows Millennium Edition (ME), NT4 and Windows 2000.
Read the instructions and use it carefully so you don't do permanent damage to the Registry. If the Registry is damaged you will have to reinstall your operating system. System Mechanic can be obtained from www.iolo.com.
Often a Windows problem can be resolved by entering Safe Mode. This can be done during start-up. When you see the message "Starting Windows" press F8. This should take you into Safe Mode.
Safe Mode loads a minimum of drivers. It allows you to find and fix problems that prevent Windows from loading properly.
Sometimes installing Windows is difficult because of unsuitable BIOS settings. If you keep getting SUWIN error messages (Windows setup) during the Windows installation, then try entering the BIOS and disabling the CPU internal cache. Try to disable the Level 2 (L2) cache if that doesn't work.
Remember to restore all the BIOS settings back to their former settings following installation.
9. Overheating:
Central processing units (CPUs) are usually equipped with fans to keep them cool. If the fan fails or if the CPU gets old it may start to overheat and generate a particular kind of error called a kernel error. This is a common problem in chips that have been overclocked to operate at higher speeds than they are supposed to.
One remedy is to get a bigger better fan and install it on top of the CPU. Specialist cooling fans/heatsinks are available in the market.
CPU problems can often be fixed by disabling the CPU internal cache in the BIOS. This will make the machine run more slowly, but it should also be more stable.
10. Power supply problems:
With all the new construction going on around the country the steady supply of electricity has become disrupted. A power surge or spike can crash a computer as easily as a power cut.
If this has become a nuisance for you then consider buying a uninterrupted power supply (UPS). This will give you a clean power supply when there is electricity, and it will give you a few minutes to perform a controlled shutdown in case of a power cut.
It is a good investment if your data are critical, because a power cut will cause any unsaved data to be lost.
Keep Files Private
If you want to encrypt the contents of an individual file or directory, Windows XP Pro will do the trick, provided you enable NTFS on your hard drive. To encrypt a file, right-click on it to bring up the Properties window. Click on the Advanced button, then in the Advanced Attributes dialog box click on Encrypt contents to secure data. This will encrypt the file (using either DES, which employs a 56-bit key on each 64-bit block of data, or 3DES, which uses a 56-bit key three times on each 64-bit block of data), and it will provide a certificate just for you. This certificate is key; if you reinstall Windows or otherwise lose your user account, your access to the encrypted files will be gone, too. You need to export your certificates to back them up: For detailed instructions, search on export certificate in Windows Help.
Windows XP does not require you to enter your password when you open the encrypted file. Once you log on to a session, encrypted files are available for you—and anyone who walks up to your system—to view.
Windows XP Home doesn't support this method. Both XP Home and XP Pro, however, let you create password-protected compressed files. To do this, right-click on the desired file and choose Send To | Compressed (zipped) Folder. Open the resulting folder and select Add a Password from the File menu; delete the original file. Note that this encryption is relatively weak. It should dissuade casual users but won't put up much of a fight against someone determined to hack it apart.
Windows XP does not require you to enter your password when you open the encrypted file. Once you log on to a session, encrypted files are available for you—and anyone who walks up to your system—to view.
Windows XP Home doesn't support this method. Both XP Home and XP Pro, however, let you create password-protected compressed files. To do this, right-click on the desired file and choose Send To | Compressed (zipped) Folder. Open the resulting folder and select Add a Password from the File menu; delete the original file. Note that this encryption is relatively weak. It should dissuade casual users but won't put up much of a fight against someone determined to hack it apart.
Saturday, August 11, 2007
Converting to NTFS
Your hard drive must be formatted with a file system such as FAT, FAT32 or NTFS so that Windows can be installed on to it. This system determines how files are named, organised and stored on the drive. If you’re not using it already, NTFS (New Technology File System) is recommended for Windows XP because of the additional functionality it offers. If your PC came with Windows XP pre-installed then there’s a chance that you’re already using NTFS. If you’ve upgraded from Windows 98 or Windows Me you may still be using FAT or FAT 32. The option to change over to NTFS would have been available during the upgrade process. Don’t worry if you skipped this as it’s possible to convert at any time from within Windows XP without losing any data.
The recommended option:
There are a number of features in Windows XP that will only work if the NTFS file system is present, which is why it’s suggested you make use of it. File and folder permissions, encryption and privacy options are just some of those you’ll be able to access. In particular, those of you who have set up user accounts will find NTFS invaluable. For instance, if you continue to use FAT or FAT32 anyone with physical access to the drive will be able to access the files and folders that are stored there. However, with NTFS you’ll be able to use a level of encryption (Professional Edition only) that will enable you to protect your data.
You’ll also find NTFS more reliable in that it’s more able to recover from disk errors than its FAT or FAT32 counterparts. A log of all disk activity is kept so should a crash occur, Windows XP can use this information to repair the file system when your PC boots up again. To find out what file system you’re using, open My Computer, right-click your main hard drive and choose Properties. Take a look at the General tab to see confirmation of the file system that’s in use.
Convert now:
You can use the convert tool in Windows XP to change the file system on your hard disk from FAT or FAT32 to NTFS. The whole process is safe and your existing data won’t be destroyed. To begin, click Start -> Run, type cmd and press [Return]. At the command prompt type convert c: /fs:ntfs and press [Return] (where ‘c’ is the letter of the drive you’re converting). When you try and run the convert utility, it’s likely that Windows XP will be using your paging file so the process won’t be completed immediately. Therefore, you’ll see a brief message on screen informing you that the conversion will take place instead the next time Windows starts up. Having restarted, the Check Disk utility will run, the conversion will be performed automatically and you may find that your PC will reboot twice more.
The benefits:
With your drive now running NTFS, it’s time to take advantage of the new options that are available. Having created a number of different user accounts you can now control the level of access that’s granted to individual users. For example, there are going to be certain files and folders that you’ll want some users to be able to access but not others. If you have Windows XP Professional Edition you can do this immediately.
Right-click any file or folder, choose Properties and select the Security tab. A dialog will be displayed showing the names of all your users. Alongside will be two columns which enable you to select levels of access for each of them, the permissions include Full Control, Modify, Read and Write. You can then check the appropriate box to determine whether or not to Allow or Deny a particular permission. For Windows XP Home Edition users, the Security tab won’t be immediately available. To access this option you’ll need to restart your PC, pressing [F8] until a menu appears. Next select Safe Mode and wait for Windows XP to start up. You can then set your options in the same way.
Another feature is NTFS compression. It’s quick and seamless as your file or folder is decompressed automatically when you access it. (Don’t confuse this with a Zip compression utility where the files need to be extracted before they can be accessed.) Although you may have used NTFS compression on a file or folder, there’s no way of telling just by looking at it. To remedy this, open My Computer, click Tools -> Folder Options and select the View tab. Under Advanced settings, scroll down and check the option ‘Show encrypted or compressed NTFS files in color’, then click Apply and OK. Take a look at your compressed items in My Computer and you’ll see the text label has changed from black to blue. Something else that’s exclusive to Professional Edition users is the Encrypting File System (EFS). You can use this to protect your important data so that no one else can read it. Your encrypted files and folders will only be accessible when you have logged into your user account successfully.
The recommended option:
There are a number of features in Windows XP that will only work if the NTFS file system is present, which is why it’s suggested you make use of it. File and folder permissions, encryption and privacy options are just some of those you’ll be able to access. In particular, those of you who have set up user accounts will find NTFS invaluable. For instance, if you continue to use FAT or FAT32 anyone with physical access to the drive will be able to access the files and folders that are stored there. However, with NTFS you’ll be able to use a level of encryption (Professional Edition only) that will enable you to protect your data.
You’ll also find NTFS more reliable in that it’s more able to recover from disk errors than its FAT or FAT32 counterparts. A log of all disk activity is kept so should a crash occur, Windows XP can use this information to repair the file system when your PC boots up again. To find out what file system you’re using, open My Computer, right-click your main hard drive and choose Properties. Take a look at the General tab to see confirmation of the file system that’s in use.
Convert now:
You can use the convert tool in Windows XP to change the file system on your hard disk from FAT or FAT32 to NTFS. The whole process is safe and your existing data won’t be destroyed. To begin, click Start -> Run, type cmd and press [Return]. At the command prompt type convert c: /fs:ntfs and press [Return] (where ‘c’ is the letter of the drive you’re converting). When you try and run the convert utility, it’s likely that Windows XP will be using your paging file so the process won’t be completed immediately. Therefore, you’ll see a brief message on screen informing you that the conversion will take place instead the next time Windows starts up. Having restarted, the Check Disk utility will run, the conversion will be performed automatically and you may find that your PC will reboot twice more.
The benefits:
With your drive now running NTFS, it’s time to take advantage of the new options that are available. Having created a number of different user accounts you can now control the level of access that’s granted to individual users. For example, there are going to be certain files and folders that you’ll want some users to be able to access but not others. If you have Windows XP Professional Edition you can do this immediately.
Right-click any file or folder, choose Properties and select the Security tab. A dialog will be displayed showing the names of all your users. Alongside will be two columns which enable you to select levels of access for each of them, the permissions include Full Control, Modify, Read and Write. You can then check the appropriate box to determine whether or not to Allow or Deny a particular permission. For Windows XP Home Edition users, the Security tab won’t be immediately available. To access this option you’ll need to restart your PC, pressing [F8] until a menu appears. Next select Safe Mode and wait for Windows XP to start up. You can then set your options in the same way.
Another feature is NTFS compression. It’s quick and seamless as your file or folder is decompressed automatically when you access it. (Don’t confuse this with a Zip compression utility where the files need to be extracted before they can be accessed.) Although you may have used NTFS compression on a file or folder, there’s no way of telling just by looking at it. To remedy this, open My Computer, click Tools -> Folder Options and select the View tab. Under Advanced settings, scroll down and check the option ‘Show encrypted or compressed NTFS files in color’, then click Apply and OK. Take a look at your compressed items in My Computer and you’ll see the text label has changed from black to blue. Something else that’s exclusive to Professional Edition users is the Encrypting File System (EFS). You can use this to protect your important data so that no one else can read it. Your encrypted files and folders will only be accessible when you have logged into your user account successfully.
Best Keyboard Shortcuts
Getting used to using your keyboard exclusively and leaving your mouse behind will make you much more efficient at performing any task on any Windows system. I use the following keyboard shortcuts every day.You also try it, believe me its fun operating without mouse:
Type the following commands in your Run Box (Windows Key + R) or Start Run
This is usually followed by:
devmgmt.msc = Device Manager
msinfo32 = System Information
cleanmgr = Disk Cleanup
ntbackup = Backup or Restore Wizard (Windows Backup Utility)
mmc = Microsoft Management Console
excel = Microsoft Excel (If Installed)
msaccess = Microsoft Access (If Installed)
powerpnt = Microsoft PowerPoint (If Installed)
winword = Microsoft Word (If Installed)
frontpg = Microsoft FrontPage (If Installed)
notepad = Notepad
wordpad = WordPad
calc = Calculator
msmsgs = Windows Messenger
mspaint = Microsoft Paint
wmplayer = Windows Media Player
rstrui = System Restore
netscp6 = Netscape 6.x
netscp = Netscape 7.x
netscape = Netscape 4.x
waol = America Online
control = Opens the Control Panel
control printers = Opens the Printers Dialog
cmd = Command Prompt
iexplore + "web address" = Internet Explorer
compmgmt.msc = Computer Management
dhcpmgmt.msc = DHCP Management
dnsmgmt.msc = DNS Management
services.msc = Services
eventvwr = Event Viewer
dsa.msc = Active Directory Users and Computers
dssite.msc = Active Directory Sites and Services
Windows key + E = Explorer
ALT + Tab = Switch between windows
ALT, Space, X = Maximize window
CTRL + Shift + Esc = Task Manager
Windows key + Break = System properties
Windows key + F = Search
Windows key + D = Hide/Display all windows
CTRL + C = copy
CTRL + X = cut
CTRL + V = paste
Also don't forget about the "Right-click" key next to the right Windows key on your keyboard. Using the arrows and that key can get just about anything done once you've opened up any program.
-------------------------
Keyboard Shortcuts:
-------------------------
[Alt] and [Esc] Switch between running applications
[Alt] and letter Select menu item by underlined letter
[Ctrl] and [Esc] Open Program Menu
[Ctrl] and [F4] Close active document or group windows (does not work with some applications)
[Alt] and [F4] Quit active application or close current window
[Alt] and [-] Open Control menu for active document
Ctrl] Lft., Rt. arrow Move cursor forward or back one word
Ctrl] Up, Down arrow Move cursor forward or back one paragraph
[F1] Open Help for active application
Windows+M Minimize all open windows
Shift+Windows+M Undo minimize all open windows
Windows+F1 Open Windows Help
Windows+Tab Cycle through the Taskbar buttons
Windows+Break Open the System Properties dialog box
---------------------------
Acessability shortcuts:
---------------------------
Right SHIFT for eight seconds........ Switch FilterKeys on and off.
Left ALT +left SHIFT +PRINT SCREEN....... Switch High Contrast on and off.
Left ALT +left SHIFT +NUM LOCK....... Switch MouseKeys on and off.
SHIFT....... five times Switch StickyKeys on and off.
NUM LOCK...... for five seconds Switch ToggleKeys on and off.
-----------------------
explorer shortcuts:
-----------------------
END....... Display the bottom of the active window.
HOME....... Display the top of the active window.
NUM LOCK+ASTERISK....... on numeric keypad (*) Display all subfolders under the selected folder.
NUM LOCK+PLUS SIGN....... on numeric keypad (+) Display the contents of the selected folder.
NUM LOCK+MINUS SIGN....... on numeric keypad (-) Collapse the selected folder.
LEFT ARROW...... Collapse current selection if it's expanded, or select parent folder.
RIGHT ARROW....... Display current selection if it's collapsed, or select first subfolder.
BACKSPACE[<-]...........To page up and traverse through different directory.
---------------------
internet browser:
---------------------
type in your address "google", then press [Right CTRL] and [Enter]
add www. and .com to word and go to it
---------------------
For Windows XP:
---------------------
Copy. CTRL+C
Cut. CTRL+X
Paste. CTRL+V
Undo. CTRL+Z
Delete. DELETE
Delete selected item permanently without placing the item in the Recycle Bin. SHIFT+DELETE
Copy selected item. CTRL while dragging an item
Create shortcut to selected item. CTRL+SHIFT while dragging an item
Rename selected item. F2
Move the insertion point to the beginning of the next word. CTRL+RIGHT ARROW
Move the insertion point to the beginning of the previous word. CTRL+LEFT ARROW
Move the insertion point to the beginning of the next paragraph. CTRL+DOWN ARROW
Move the insertion point to the beginning of the previous paragraph. CTRL+UP ARROW
Highlight a block of text. CTRL+SHIFT with any of the arrow keys
Select more than one item in a window or on the desktop, or select text within a document. SHIFT with any of the arrow keys
Select all. CTRL+A
Search for a file or folder. F3
View properties for the selected item. ALT+ENTER
Close the active item, or quit the active program. ALT+F4
Opens the shortcut menu for the active window. ALT+SPACEBAR
Close the active document in programs that allow you to have multiple documents open simultaneously. CTRL+F4
Switch between open items. ALT+TAB
Cycle through items in the order they were opened. ALT+ESC
Cycle through screen elements in a window or on the desktop. F6
Display the Address bar list in My Computer or Windows Explorer. F4
Display the shortcut menu for the selected item. SHIFT+F10
Display the System menu for the active window. ALT+SPACEBAR
Display the Start menu. CTRL+ESC
Display the corresponding menu. ALT+Underlined letter in a menu name
Carry out the corresponding command. Underlined letter in a command name on an open menu
Activate the menu bar in the active program. F10
Open the next menu to the right, or open a submenu. RIGHT ARROW
Open the next menu to the left, or close a submenu. LEFT ARROW
Refresh the active window. F5
View the folder one level up in My Computer or Windows Explorer. BACKSPACE
Cancel the current task. ESC
SHIFT when you insert a CD into the CD-ROM drive Prevent the CD from automatically playing.
-------------------------------------------------------
Use these keyboard shortcuts for dialog boxes:
-------------------------------------------------------
To Press
Move forward through tabs. CTRL+TAB
Move backward through tabs. CTRL+SHIFT+TAB
Move forward through options. TAB
Move backward through options. SHIFT+TAB
Carry out the corresponding command or select the corresponding option. ALT+Underlined letter
Carry out the command for the active option or button. ENTER
Select or clear the check box if the active option is a check box. SPACEBAR
Select a button if the active option is a group of option buttons. Arrow keys
Display Help. F1
Display the items in the active list. F4
Open a folder one level up if a folder is selected in the Save As or Open dialog box. BACKSPACE
If you have a Microsoft Natural Keyboard, or any other compatible keyboard that includes the Windows logo key and the Application key , you can use these keyboard shortcuts:
Display or hide the Start menu. WIN Key
Display the System Properties dialog box. WIN Key+BREAK
Show the desktop. WIN Key+D
Minimize all windows. WIN Key+M
Restores minimized windows. WIN Key+Shift+M
Open My Computer. WIN Key+E
Search for a file or folder. WIN Key+F
Search for computers. CTRL+WIN Key+F
Display Windows Help. WIN Key+F1
Lock your computer if you are connected to a network domain, or switch users if you are not connected to a network domain. WIN Key+ L
Open the Run dialog box. WIN Key+R
Open Utility Manager. WIN Key+U
----------------------------------------
Accessibility keyboard shortcuts:
----------------------------------------
Switch FilterKeys on and off. Right SHIFT for eight seconds
Switch High Contrast on and off. Left ALT+left SHIFT+PRINT SCREEN
Switch MouseKeys on and off. Left ALT +left SHIFT +NUM LOCK
Switch StickyKeys on and off. SHIFT five times
Switch ToggleKeys on and off. NUM LOCK for five seconds
Open Utility Manager. WIN Key+U
-------------------------------------------------------
Shortcuts you can use with Windows Explorer:
-------------------------------------------------------
Display the bottom of the active window. END
Display the top of the active window. HOME
Display all subfolders under the selected folder. NUM LOCK+ASTERISK on numeric keypad (*)
Display the contents of the selected folder. NUM LOCK+PLUS SIGN on numeric keypad (+)
Collapse the selected folder. NUM LOCK+MINUS SIGN on numeric keypad (-)
Collapse current selection if it's expanded, or select parent folder. LEFT ARROW
Display current selection if it's collapsed, or select first subfolder. RIGHT ARROW
----------------------------------------
Shortcut Keys for Character Map:
----------------------------------------
After you double-click a character on the grid of characters, you can move through the grid by using the keyboard shortcuts:
RIGHT ARROW (Move to the right or to the beginning of the next line)
LEFT ARROW (Move to the left or to the end of the previous line)
UP ARROW (Move up one row)
DOWN ARROW (Move down one row)
PAGE UP (Move up one screen at a time)
PAGE DOWN (Move down one screen at a time)
HOME (Move to the beginning of the line)
END (Move to the end of the line)
CTRL+HOME (Move to the first character)
CTRL+END (Move to the last character)
SPACEBAR (Switch between Enlarged and Normal mode when a character is selected)
WISE WORDS:A lie never lives to be old.
Type the following commands in your Run Box (Windows Key + R) or Start Run
This is usually followed by:
devmgmt.msc = Device Manager
msinfo32 = System Information
cleanmgr = Disk Cleanup
ntbackup = Backup or Restore Wizard (Windows Backup Utility)
mmc = Microsoft Management Console
excel = Microsoft Excel (If Installed)
msaccess = Microsoft Access (If Installed)
powerpnt = Microsoft PowerPoint (If Installed)
winword = Microsoft Word (If Installed)
frontpg = Microsoft FrontPage (If Installed)
notepad = Notepad
wordpad = WordPad
calc = Calculator
msmsgs = Windows Messenger
mspaint = Microsoft Paint
wmplayer = Windows Media Player
rstrui = System Restore
netscp6 = Netscape 6.x
netscp = Netscape 7.x
netscape = Netscape 4.x
waol = America Online
control = Opens the Control Panel
control printers = Opens the Printers Dialog
cmd = Command Prompt
iexplore + "web address" = Internet Explorer
compmgmt.msc = Computer Management
dhcpmgmt.msc = DHCP Management
dnsmgmt.msc = DNS Management
services.msc = Services
eventvwr = Event Viewer
dsa.msc = Active Directory Users and Computers
dssite.msc = Active Directory Sites and Services
Windows key + E = Explorer
ALT + Tab = Switch between windows
ALT, Space, X = Maximize window
CTRL + Shift + Esc = Task Manager
Windows key + Break = System properties
Windows key + F = Search
Windows key + D = Hide/Display all windows
CTRL + C = copy
CTRL + X = cut
CTRL + V = paste
Also don't forget about the "Right-click" key next to the right Windows key on your keyboard. Using the arrows and that key can get just about anything done once you've opened up any program.
-------------------------
Keyboard Shortcuts:
-------------------------
[Alt] and [Esc] Switch between running applications
[Alt] and letter Select menu item by underlined letter
[Ctrl] and [Esc] Open Program Menu
[Ctrl] and [F4] Close active document or group windows (does not work with some applications)
[Alt] and [F4] Quit active application or close current window
[Alt] and [-] Open Control menu for active document
Ctrl] Lft., Rt. arrow Move cursor forward or back one word
Ctrl] Up, Down arrow Move cursor forward or back one paragraph
[F1] Open Help for active application
Windows+M Minimize all open windows
Shift+Windows+M Undo minimize all open windows
Windows+F1 Open Windows Help
Windows+Tab Cycle through the Taskbar buttons
Windows+Break Open the System Properties dialog box
---------------------------
Acessability shortcuts:
---------------------------
Right SHIFT for eight seconds........ Switch FilterKeys on and off.
Left ALT +left SHIFT +PRINT SCREEN....... Switch High Contrast on and off.
Left ALT +left SHIFT +NUM LOCK....... Switch MouseKeys on and off.
SHIFT....... five times Switch StickyKeys on and off.
NUM LOCK...... for five seconds Switch ToggleKeys on and off.
-----------------------
explorer shortcuts:
-----------------------
END....... Display the bottom of the active window.
HOME....... Display the top of the active window.
NUM LOCK+ASTERISK....... on numeric keypad (*) Display all subfolders under the selected folder.
NUM LOCK+PLUS SIGN....... on numeric keypad (+) Display the contents of the selected folder.
NUM LOCK+MINUS SIGN....... on numeric keypad (-) Collapse the selected folder.
LEFT ARROW...... Collapse current selection if it's expanded, or select parent folder.
RIGHT ARROW....... Display current selection if it's collapsed, or select first subfolder.
BACKSPACE[<-]...........To page up and traverse through different directory.
---------------------
internet browser:
---------------------
type in your address "google", then press [Right CTRL] and [Enter]
add www. and .com to word and go to it
---------------------
For Windows XP:
---------------------
Copy. CTRL+C
Cut. CTRL+X
Paste. CTRL+V
Undo. CTRL+Z
Delete. DELETE
Delete selected item permanently without placing the item in the Recycle Bin. SHIFT+DELETE
Copy selected item. CTRL while dragging an item
Create shortcut to selected item. CTRL+SHIFT while dragging an item
Rename selected item. F2
Move the insertion point to the beginning of the next word. CTRL+RIGHT ARROW
Move the insertion point to the beginning of the previous word. CTRL+LEFT ARROW
Move the insertion point to the beginning of the next paragraph. CTRL+DOWN ARROW
Move the insertion point to the beginning of the previous paragraph. CTRL+UP ARROW
Highlight a block of text. CTRL+SHIFT with any of the arrow keys
Select more than one item in a window or on the desktop, or select text within a document. SHIFT with any of the arrow keys
Select all. CTRL+A
Search for a file or folder. F3
View properties for the selected item. ALT+ENTER
Close the active item, or quit the active program. ALT+F4
Opens the shortcut menu for the active window. ALT+SPACEBAR
Close the active document in programs that allow you to have multiple documents open simultaneously. CTRL+F4
Switch between open items. ALT+TAB
Cycle through items in the order they were opened. ALT+ESC
Cycle through screen elements in a window or on the desktop. F6
Display the Address bar list in My Computer or Windows Explorer. F4
Display the shortcut menu for the selected item. SHIFT+F10
Display the System menu for the active window. ALT+SPACEBAR
Display the Start menu. CTRL+ESC
Display the corresponding menu. ALT+Underlined letter in a menu name
Carry out the corresponding command. Underlined letter in a command name on an open menu
Activate the menu bar in the active program. F10
Open the next menu to the right, or open a submenu. RIGHT ARROW
Open the next menu to the left, or close a submenu. LEFT ARROW
Refresh the active window. F5
View the folder one level up in My Computer or Windows Explorer. BACKSPACE
Cancel the current task. ESC
SHIFT when you insert a CD into the CD-ROM drive Prevent the CD from automatically playing.
-------------------------------------------------------
Use these keyboard shortcuts for dialog boxes:
-------------------------------------------------------
To Press
Move forward through tabs. CTRL+TAB
Move backward through tabs. CTRL+SHIFT+TAB
Move forward through options. TAB
Move backward through options. SHIFT+TAB
Carry out the corresponding command or select the corresponding option. ALT+Underlined letter
Carry out the command for the active option or button. ENTER
Select or clear the check box if the active option is a check box. SPACEBAR
Select a button if the active option is a group of option buttons. Arrow keys
Display Help. F1
Display the items in the active list. F4
Open a folder one level up if a folder is selected in the Save As or Open dialog box. BACKSPACE
If you have a Microsoft Natural Keyboard, or any other compatible keyboard that includes the Windows logo key and the Application key , you can use these keyboard shortcuts:
Display or hide the Start menu. WIN Key
Display the System Properties dialog box. WIN Key+BREAK
Show the desktop. WIN Key+D
Minimize all windows. WIN Key+M
Restores minimized windows. WIN Key+Shift+M
Open My Computer. WIN Key+E
Search for a file or folder. WIN Key+F
Search for computers. CTRL+WIN Key+F
Display Windows Help. WIN Key+F1
Lock your computer if you are connected to a network domain, or switch users if you are not connected to a network domain. WIN Key+ L
Open the Run dialog box. WIN Key+R
Open Utility Manager. WIN Key+U
----------------------------------------
Accessibility keyboard shortcuts:
----------------------------------------
Switch FilterKeys on and off. Right SHIFT for eight seconds
Switch High Contrast on and off. Left ALT+left SHIFT+PRINT SCREEN
Switch MouseKeys on and off. Left ALT +left SHIFT +NUM LOCK
Switch StickyKeys on and off. SHIFT five times
Switch ToggleKeys on and off. NUM LOCK for five seconds
Open Utility Manager. WIN Key+U
-------------------------------------------------------
Shortcuts you can use with Windows Explorer:
-------------------------------------------------------
Display the bottom of the active window. END
Display the top of the active window. HOME
Display all subfolders under the selected folder. NUM LOCK+ASTERISK on numeric keypad (*)
Display the contents of the selected folder. NUM LOCK+PLUS SIGN on numeric keypad (+)
Collapse the selected folder. NUM LOCK+MINUS SIGN on numeric keypad (-)
Collapse current selection if it's expanded, or select parent folder. LEFT ARROW
Display current selection if it's collapsed, or select first subfolder. RIGHT ARROW
----------------------------------------
Shortcut Keys for Character Map:
----------------------------------------
After you double-click a character on the grid of characters, you can move through the grid by using the keyboard shortcuts:
RIGHT ARROW (Move to the right or to the beginning of the next line)
LEFT ARROW (Move to the left or to the end of the previous line)
UP ARROW (Move up one row)
DOWN ARROW (Move down one row)
PAGE UP (Move up one screen at a time)
PAGE DOWN (Move down one screen at a time)
HOME (Move to the beginning of the line)
END (Move to the end of the line)
CTRL+HOME (Move to the first character)
CTRL+END (Move to the last character)
SPACEBAR (Switch between Enlarged and Normal mode when a character is selected)
WISE WORDS:A lie never lives to be old.
Friday, August 10, 2007
Change Default Location of i386 Folder
Occasionally when attempting to install something, you are asked to insert the windows xp cd, and sometimes you’re just too lazy to get up and go get it, or it's not available to you at the moment. Well here’s something that'll solve that problem...
1. Insert your windows xp cd
2. Click on, “Perform Additional Tasks”
3. Now click on, “Browse this CD”
4. Look for the I386 folder, right-click on the folder and copy.
5. Go into, “My Computer”
6. Right click on you C: drive and paste.
How can I change the default location of the i386 folder?
After installing Windows 2000 or XP, if you ever need to add a component to it (like DHCP etc.) it always asks you for the CD, even if you copy the i386 files to your local drive. Can I fix this?
Yes you sure can.
1. Open the registry editor and go to:
HKEY_LOCAL_MACHINE\SOFTWARE\Microsoft\Windows\CurrentVersion\Setup
2. Highlight the Setup folder.
3. On the right pane, locate the SourcePath.
4. Double-click the SourcePath and replace the drive letter in the box to C:\ (if you copied the files to your C:\ drive). Make sure it's C:\ and not C:\i386.
5. Close the registry editor.
6. If the system ever needs files from the i386 folder, it will automatically look in the C:\i386 folder.
You can also do the trick with Windows 2000 and XP Professional client computers that were installed from a shared folder on your network, but do not copy the i386 folder to the local drive of each computer. Instead, copy the i386 folder to a share located on a network server. Edit the registry for the Windows 2000 or XP Pro machines and make it point to the UNC path of the network server.
Also, if you installed from a RIS server, keep the RIS server running. Your system is smart enough to grab the files from the RIS server when it needs extra files.
This tip works for service packs too. You'll notice at the registry string from step #1 that it says service packsourcepath. Extract the SP from the command prompt to a folder on your hard drive using the w2ksp# -x switch, make the path in the registry where you put the files, and you won't have to go fishing for service pack disks again.
Well folks, from now on you should never be asked for that cd again…
*BTW, after all my writing, I found a program that takes the place of having to modify the registry manually. It’s called BanishCD from AnalogX. Here’s what they have to say:
One of the best ways to make Windows more convenient is to copy the CAB files from the CD onto your harddrive, so whenever you install any new hardware, you don't need to put the CD in your system. Unfortunately, Windows still ASKS for the CD, and you need to point it to where you copied the CAB files to, until now...
AnalogX BanishCD is a small utility that allows you to change the path that Windows will look for the CAB files. Normally, the only way this could be done would be to modify the registry manually, which is a very tricky process, and if you make a mistake it can be hard to repair. With BanishCD, you can quickly browse through your system and select the path; and just in case you make a mistake it will store the original path!
Download BanishCD from here:
CODE
hxxp://www.analogx.com/contents/download/system/banishcd.htm
1. Insert your windows xp cd
2. Click on, “Perform Additional Tasks”
3. Now click on, “Browse this CD”
4. Look for the I386 folder, right-click on the folder and copy.
5. Go into, “My Computer”
6. Right click on you C: drive and paste.
How can I change the default location of the i386 folder?
After installing Windows 2000 or XP, if you ever need to add a component to it (like DHCP etc.) it always asks you for the CD, even if you copy the i386 files to your local drive. Can I fix this?
Yes you sure can.
1. Open the registry editor and go to:
HKEY_LOCAL_MACHINE\SOFTWARE\Microsoft\Windows\CurrentVersion\Setup
2. Highlight the Setup folder.
3. On the right pane, locate the SourcePath.
4. Double-click the SourcePath and replace the drive letter in the box to C:\ (if you copied the files to your C:\ drive). Make sure it's C:\ and not C:\i386.
5. Close the registry editor.
6. If the system ever needs files from the i386 folder, it will automatically look in the C:\i386 folder.
You can also do the trick with Windows 2000 and XP Professional client computers that were installed from a shared folder on your network, but do not copy the i386 folder to the local drive of each computer. Instead, copy the i386 folder to a share located on a network server. Edit the registry for the Windows 2000 or XP Pro machines and make it point to the UNC path of the network server.
Also, if you installed from a RIS server, keep the RIS server running. Your system is smart enough to grab the files from the RIS server when it needs extra files.
This tip works for service packs too. You'll notice at the registry string from step #1 that it says service packsourcepath. Extract the SP from the command prompt to a folder on your hard drive using the w2ksp# -x switch, make the path in the registry where you put the files, and you won't have to go fishing for service pack disks again.
Well folks, from now on you should never be asked for that cd again…
*BTW, after all my writing, I found a program that takes the place of having to modify the registry manually. It’s called BanishCD from AnalogX. Here’s what they have to say:
One of the best ways to make Windows more convenient is to copy the CAB files from the CD onto your harddrive, so whenever you install any new hardware, you don't need to put the CD in your system. Unfortunately, Windows still ASKS for the CD, and you need to point it to where you copied the CAB files to, until now...
AnalogX BanishCD is a small utility that allows you to change the path that Windows will look for the CAB files. Normally, the only way this could be done would be to modify the registry manually, which is a very tricky process, and if you make a mistake it can be hard to repair. With BanishCD, you can quickly browse through your system and select the path; and just in case you make a mistake it will store the original path!
Download BanishCD from here:
CODE
hxxp://www.analogx.com/contents/download/system/banishcd.htm
Restore JPG,JPEG,JPE Default File Associations
JPG,JPEG,JPE File associations fixes:
This reg file will restore the default file associations.
1. Copy the following (everything in the box) into notepdad.
QUOTE
Windows Registry Editor Version 5.00
[HKEY_CLASSES_ROOT\.jpe]
"PerceivedType"="image"
@="jpegfile"
"Content Type"="image/jpeg"
[HKEY_CLASSES_ROOT\.jpe\OpenWithProgids]
"jpegfile"=hex(0):
[HKEY_CLASSES_ROOT\.jpe\PersistentHandler]
@="{098f2470-bae0-11cd-b579-08002b30bfeb}"
[HKEY_CLASSES_ROOT\.jpeg]
"PerceivedType"="image"
@="jpegfile"
"Content Type"="image/jpeg"
[HKEY_CLASSES_ROOT\.jpeg\jpegfile]
[HKEY_CLASSES_ROOT\.jpeg\jpegfile\ShellNew]
[HKEY_CLASSES_ROOT\.jpeg\OpenWithProgids]
"jpegfile"=hex(0):
[HKEY_CLASSES_ROOT\.jpeg\PersistentHandler]
@="{098f2470-bae0-11cd-b579-08002b30bfeb}"
[HKEY_CLASSES_ROOT\.jpg]
"PerceivedType"="image"
@="jpegfile"
"Content Type"="image/jpeg"
[HKEY_CLASSES_ROOT\.jpg\jpegfile]
[HKEY_CLASSES_ROOT\.jpg\jpegfile\ShellNew]
[HKEY_CLASSES_ROOT\.jpg\OpenWithProgids]
"jpegfile"=hex(0):
2. Save the file as assoc_fix.reg
3. Double click the file to import into your registry.
NOTE: If your anti-virus software warns you of a "malicious" script, this is normal if you have "Script Safe" or similar technology enabled.
This reg file will restore the default file associations.
1. Copy the following (everything in the box) into notepdad.
QUOTE
Windows Registry Editor Version 5.00
[HKEY_CLASSES_ROOT\.jpe]
"PerceivedType"="image"
@="jpegfile"
"Content Type"="image/jpeg"
[HKEY_CLASSES_ROOT\.jpe\OpenWithProgids]
"jpegfile"=hex(0):
[HKEY_CLASSES_ROOT\.jpe\PersistentHandler]
@="{098f2470-bae0-11cd-b579-08002b30bfeb}"
[HKEY_CLASSES_ROOT\.jpeg]
"PerceivedType"="image"
@="jpegfile"
"Content Type"="image/jpeg"
[HKEY_CLASSES_ROOT\.jpeg\jpegfile]
[HKEY_CLASSES_ROOT\.jpeg\jpegfile\ShellNew]
[HKEY_CLASSES_ROOT\.jpeg\OpenWithProgids]
"jpegfile"=hex(0):
[HKEY_CLASSES_ROOT\.jpeg\PersistentHandler]
@="{098f2470-bae0-11cd-b579-08002b30bfeb}"
[HKEY_CLASSES_ROOT\.jpg]
"PerceivedType"="image"
@="jpegfile"
"Content Type"="image/jpeg"
[HKEY_CLASSES_ROOT\.jpg\jpegfile]
[HKEY_CLASSES_ROOT\.jpg\jpegfile\ShellNew]
[HKEY_CLASSES_ROOT\.jpg\OpenWithProgids]
"jpegfile"=hex(0):
2. Save the file as assoc_fix.reg
3. Double click the file to import into your registry.
NOTE: If your anti-virus software warns you of a "malicious" script, this is normal if you have "Script Safe" or similar technology enabled.
10 Fast and Free Security Enhancements
Before you spend a dime on security, there are many precautions you can take that will protect you against the most common threats.
1. Check Windows Update and Office Update regularly. (_http://office.microsoft.com/productupdates); have your Office CD ready. Windows Me, 2000, and XP users can configure automatic updates. Click on the Automatic Updates tab in the System control panel and choose the appropriate options.
2. Install a personal firewall.
Both SyGate and ZoneAlarm offer free versions.
3. Install a free spyware blocker.
SpyBot Search & Destroy. SpyBot is also paranoid and ruthless in hunting out tracking cookies.
4. Block pop-up spam messages in Windows NT, 2000, or XP by disabling the Windows Messenger service (this is unrelated to the instant messaging program). Open Control Panel | Administrative Tools | Services and you'll see Messenger. Right-click and go to Properties. Set Start-up Type to Disabled and press the Stop button. Bye-bye, spam pop-ups! Any good firewall will also stop them.
5. Use strong passwords and change them periodically. Passwords should have at least seven characters; use letters and numbers and have at least one symbol. A decent example would be g9izKro@l. This will make it much harder for anyone to gain access to your accounts.
6. If you're using Outlook or Outlook Express, use the current version or one with the Outlook Security Update installed. The update and current versions patch numerous vulnerabilities.
7. Buy antivirus software and keep it up to date. If you're not willing to pay, try Grisoft AVG Free Edition. And doublecheck your AV with the free, online-only scanners available at _www.pandasoftware.com/activescan and _http://housecall.trendmicro.com.
8. If you have a wireless network, turn on the security features: Use MAC filtering, turn off SSID broadcast, and even use WEP with the biggest key you can get. For more, check out our wireless section or see the expanded coverage in Your Unwired World in our next issue.
9. Join a respectable e-mail security list, such as the one found at our own Security Supersite at _http://security.ziffdavis.com, so that you learn about emerging threats quickly and can take proper precautions.
10. Be skeptical of things on the Internet. Don't assume that e-mail "From:" a particular person is actually from that person until you have further reason to believe it's that person. Don't assume that an attachment is what it says it is. Don't give out your password to anyone, even if that person claims to be from "support."
1. Check Windows Update and Office Update regularly. (_http://office.microsoft.com/productupdates); have your Office CD ready. Windows Me, 2000, and XP users can configure automatic updates. Click on the Automatic Updates tab in the System control panel and choose the appropriate options.
2. Install a personal firewall.
Both SyGate and ZoneAlarm offer free versions.
3. Install a free spyware blocker.
SpyBot Search & Destroy. SpyBot is also paranoid and ruthless in hunting out tracking cookies.
4. Block pop-up spam messages in Windows NT, 2000, or XP by disabling the Windows Messenger service (this is unrelated to the instant messaging program). Open Control Panel | Administrative Tools | Services and you'll see Messenger. Right-click and go to Properties. Set Start-up Type to Disabled and press the Stop button. Bye-bye, spam pop-ups! Any good firewall will also stop them.
5. Use strong passwords and change them periodically. Passwords should have at least seven characters; use letters and numbers and have at least one symbol. A decent example would be g9izKro@l. This will make it much harder for anyone to gain access to your accounts.
6. If you're using Outlook or Outlook Express, use the current version or one with the Outlook Security Update installed. The update and current versions patch numerous vulnerabilities.
7. Buy antivirus software and keep it up to date. If you're not willing to pay, try Grisoft AVG Free Edition. And doublecheck your AV with the free, online-only scanners available at _www.pandasoftware.com/activescan and _http://housecall.trendmicro.com.
8. If you have a wireless network, turn on the security features: Use MAC filtering, turn off SSID broadcast, and even use WEP with the biggest key you can get. For more, check out our wireless section or see the expanded coverage in Your Unwired World in our next issue.
9. Join a respectable e-mail security list, such as the one found at our own Security Supersite at _http://security.ziffdavis.com, so that you learn about emerging threats quickly and can take proper precautions.
10. Be skeptical of things on the Internet. Don't assume that e-mail "From:" a particular person is actually from that person until you have further reason to believe it's that person. Don't assume that an attachment is what it says it is. Don't give out your password to anyone, even if that person claims to be from "support."
Thursday, August 9, 2007
How To Restrict Login Hours Allowed
To restrict a users logon hours , use the net user command. These commands are used from the Command Prompt. (Start - RUN - and type cmd)
Below are some examples:
1 - net user Joanna /time:M-F,08:00-17:00
2 - net user Ninja /time:M-F,8am-5pm
3 - net user Echelon /time:M,4am-5pm;T,1pm-3pm;W-F,8:00-17:00
4 - net user Shine /time:all (this one means this user can always log on)
Note:You can only restrict when a user can log on to the system. On a stand alone computer, there is no way to force a user to log off when their hours expire, without a third party script or software.
Below are some examples:
1 - net user Joanna /time:M-F,08:00-17:00
2 - net user Ninja /time:M-F,8am-5pm
3 - net user Echelon /time:M,4am-5pm;T,1pm-3pm;W-F,8:00-17:00
4 - net user Shine /time:all (this one means this user can always log on)
Note:You can only restrict when a user can log on to the system. On a stand alone computer, there is no way to force a user to log off when their hours expire, without a third party script or software.
Wednesday, August 8, 2007
Keep Your Computer Clean Always
All of you must have to agree with me on something and that is Computing can only be fun when you when your computer runs smooth and faster. Right? So try to keep it clean on both hardware & software level. Only a clean computer runs faster and lasts longer. Its important to take care about this major investment of yours. There are few things you can do which are very easy but extremely effective to keep your computer in health. After all as long as it would last, its only going to serve you.
Here is some tips to keep the hardware runs smoothly...
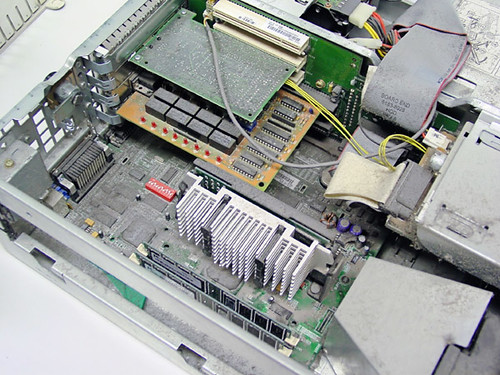
1. Clean out the dust particles. Dust is the silent PC killer. Every once and a while you should open it up and clean it out. Some experts suggests using vacuum cleaner for this purpose but i don’t like to think otherwise. Because some dust cleaners are so powerful in sucking air that might harmful. You can of always use dust remover.
2.Keep your PC cool place. You should always make sure that you keep your computer in a well ventilated area. By doing this you help keep the PC cool and, therefore, will prolong the life of your buddy’s hardware.
3.Develop a habit of purchasing quality hardware.Try to get good quality parts when you buy new components for your PC. If you get components always prefer buying from esteemed manufacturers you can be sure that you will get good technical support and the parts will be well made and not cause problems with other existing hardware.
4.Make sure various power supply is uniform. Take note that each plug is plugged into surge protected outlet strips which are plugged into a UPS (Uninterrupted Power Supply).
5.All items should be properly installed in your computer. When you replace any hardware with a new one, you must install the proper drivers for the new component.
6. Special care should be taken while cleaning the monitor screen. Turn off the monitor before you try any attempt to clean it. Use a soft, clean cloth something like t-shirt and spray a little window cleaner on the cloth. Do not spray cleaner on the monitor or laptop screens. Apply the little wet cloth across the display area first, then the frame and outer casing. This will surly improve the visibility of the images. Of course
use a quality cleaner for this purpose.
7. Consider replacing old UPS, power cables and other important electrical components that may be worn. If you had several outages while using your UPS, you may consider replacing it. If the equipment is at least three years old, then at least inspect it. Some items last longer, but like an old car, you should watch them.
Now time for some software operations to maintain the operating system of your PC...
1. Run the defragmenter utility at least once every month or two. In Windows XP, this can be done by going to your Start menu -> Programs -> Accessories -> System Tools -> Disk Defragmenter. The defragmenter will help ensure that your files are located at the right place on the hard drive and should boost the overall speed of your computer.
2. Run a disk scan to check for hard drive issues. Open My computer -> Right click on the drive [c:.d:,e:..] -> Properties -> tools -> Check Now. This option will check that specific drive for errors and fix it.
3. Empty your recycle bin once in a month.
4. Delete your Internet files.
5. Clear your browsing history.
6. Delete your cookies.
7. Clean up old & temporary files. When you install/uninstall software frequently it can leave many unwanted files in temporary and system folders. In Windows XP, you should run the Disk Cleanup utility once and a while to clean things up. This utility can be found by clicking the Start menu -> All Programs -> Accessories -> System Tools -> Disk Cleanup.
8. Should full system scan can for viruses once in a fortnight. Viruses can cause your computer to be slow or not work at all. You should always have a good virus scanner installed and keep it up to date. Some well known virus scanners are Norton, McAfee and AVG.
9. Scan for other malware. Other malware can include spyware, adware, key loggers, and Trojan horses. These pieces of software can get installed without your knowledge when you install another program or visit a website. They can cause your PC to slow down considerably. Spybot Search & Destroy and Adware are two well known malware scanners.
That’s all for now. Later someday we will dive into extensive details of PC maintenance & troubleshooting. We will see that not tough you thought before.
Install Xp From Dos
If XP will not install from the CD or if you have a new drive with no operating system on
it yet try these:
Install Windows XP from the hard drive with Windows 98 already installed:
Boot Windows 98
Insert the XP CD into your CD reader
Explore Windows XP through My Computer
Copy i386 folder to C:\
Go into C:\i386 folder and double click on winnt32.exe to launch the setup from the hard drive
Install Windows XP from DOS (ie. no OS on a new hard drive):
Boot with a Windows 98 Start Up disk
Insert the Windows 98 CD into the CD reader
Run smartdrv.exe from the Win98 directory on the windows 98 CD (file caching)
Type cd.. to back up to the root directory
Insert Windows XP CD into the CD reader
Copy the i386 folder to C:\
Go into C:\i386 folder on C: and type winnt.exe to launch the setup from the hard drive.
it yet try these:
Install Windows XP from the hard drive with Windows 98 already installed:
Boot Windows 98
Insert the XP CD into your CD reader
Explore Windows XP through My Computer
Copy i386 folder to C:\
Go into C:\i386 folder and double click on winnt32.exe to launch the setup from the hard drive
Install Windows XP from DOS (ie. no OS on a new hard drive):
Boot with a Windows 98 Start Up disk
Insert the Windows 98 CD into the CD reader
Run smartdrv.exe from the Win98 directory on the windows 98 CD (file caching)
Type cd.. to back up to the root directory
Insert Windows XP CD into the CD reader
Copy the i386 folder to C:\
Go into C:\i386 folder on C: and type winnt.exe to launch the setup from the hard drive.
Subscribe to:
Posts (Atom)